Devcontainers: how to pack your dev environment in a lunchbox (and keep it tasting good)
Posted on April 20, 2026 • 11 minutes • 2298 words
Table of contents
- Why use devcontainers (and when they might not be worth it)
- VS Code: living inside a container without (really) noticing
- PyCharm and Rider: hopping into someone else’s lunchbox
- More things to tinker with in
devcontainer.json - Epilogue: devcontainers and the dream of “works the same everywhere”
- Quick glossary
- Sources and references
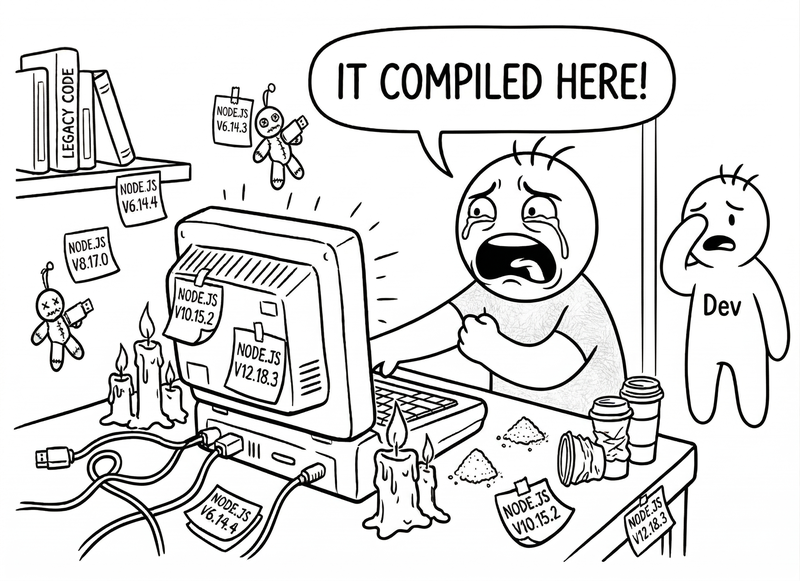
“It works on my machine.”
And the new laptop, production, and your coworker’s machine couldn’t care less. That’s how the ritual starts: “what version of Node do you have?”, “did you have this lib installed?”, “the tests pass for me.”
Devcontainers exist precisely to kill that genre of arguments. The concept is simple enough to feel like an insult to your intelligence: instead of having a different dev environment on every laptop, you carry the environment inside a Docker container.
A devcontainer.json file describes everything you need: base image, runtime versions, tools, editor extensions, ports… and your IDE (VS Code, PyCharm, Rider, etc.) opens the project inside that container
.
In plain English: the whole team develops “on the same machine,” even though each person uses whatever laptop they want. And switching projects isn’t reconfiguring half your system: it’s opening another folder and having the IDE drop you into a different container.
Let’s walk through it:
- Why you’d want to use devcontainers (and when you might not).
- How to install and use devcontainers in VS Code, step by step.
- How to hook PyCharm and Rider into existing devcontainers.
- And how to survive the experience with some humor and without losing your dev soul.
Why use devcontainers (and when they might not be worth it)
Imagine that in a repository, right next to the code, you have a sort of “recipe” called .devcontainer/devcontainer.json
. That recipe says:
- “For this project, use Linux with such-and-such version of Python/Node/Java/.NET.”
- “Also install these tools: git, make, docker-cli, whatever.”
- “Open these ports, mount this volume, configure this PATH.”
- “If you’re coming in with VS Code, install these extensions.”
The IDE reads that, spins up a Docker container with those specs, and jumps inside. Result:
- Consistency: you, your coworker, the new junior, and the CI machine are all developing in the same environment — not similar ones.
- Isolation: if this project needs Python 3.8 and the other one needs Python 3.12, they don’t fight on your host; each one lives in its container, perfectly happy.
- Portability: clone the repo on another machine, open the IDE, hit “Reopen in Container,” and done. Zero “installation steps” docs.
Downsides? It’s got those too:
- You need Docker (or a compatible runtime) installed and reasonably well configured: if your laptop already struggles with Docker, a devcontainer isn’t going to fix that by magic.
- The first launch can take a while: building the image, pulling packages, etc. After that it’s smoother, but the first time is good for a coffee break.
- It’s another mental layer: container + IDE + host. It’s not complicated, but if you’ve never touched Docker, you’re better off reading the installing Docker without pain article first.
If that seems like a fair price, what you get in return is genuinely valuable: you stop playing Tetris with “versions on the host” and move the mess to a declarative place that lives in the repo.
VS Code: living inside a container without (really) noticing
VS Code is, right now, the one that’s nailed the devcontainer experience best. The “Dev Containers” extension is official, well documented, and — surprisingly — does what it promises.
1. What you need before touching anything
- Docker running on your machine.
- On Windows: the most sensible setup is Docker on WSL2, as I explain in the Docker article ([LINK A DOCKER] and [LINK A WSL]).
- On macOS: Docker Desktop or Colima (also covered in the Docker guide).
- VS Code installed.
- The “Dev Containers” extension (search the marketplace: “Dev Containers,” by Microsoft).
Once all that’s in place, here’s where it gets interesting.
2. Creating a devcontainer from scratch in VS Code
Let’s say you have a “normal” project folder on your machine and you want to turn it into a “project with devcontainer.” The steps are few and fairly painless:
- Open the project in VS Code (
File > Open Folder...orcode .from the terminal). - Open the Command Palette (Ctrl+Shift+P / Cmd+Shift+P) and type:
Dev Containers: Add Dev Container Configuration Files...and press Enter. - VS Code will ask you what you want as a base. You’ve got several options:
- A list of typical stacks: Node, Python, .NET, Java, Go, etc.
- Prebuilt Microsoft images:
mcr.microsoft.com/devcontainers/.... - You can even specify that you want to start from your own Dockerfile or
docker-compose.yml.
Pick, for example, “Python” if you’re building a Django/FastAPI/Flask backend, or “Node” if it’s an Express API.
4. VS Code will create a .devcontainer/ folder in your project, with at least a devcontainer.json file and sometimes an associated Dockerfile.
A minimal setup might look like:
{
  "name": "My Python Project",
  "image": "mcr.microsoft.com/devcontainers/python:3.12",
  "forwardPorts": [8000],
  "customizations": {
    "vscode": {
      "extensions": [
        "ms-python.python",
        "ms-python.black-formatter"
      ]
    }
  }
}
- Now go back to the Command Palette and run:
Dev Containers: Reopen in Container.
VS Code will do its thing:
- Build the image (if needed).
- Create a container.
- Mount your project folder inside the container.
- Install the listed extensions.
All with a progress bar that, the first time around, tells you exactly how much coffee you need.
6. When it’s done, you’ll be “inside the container”:
- The integrated terminal (View > Terminal) is no longer your host; if you run uname -a you’ll see Linux with the container’s info.
- python, node, java… will be the container’s, not the host’s.
- The files you see in the Explorer panel are the same as always, but mounted from the container.
From that point on, developing feels exactly the same… except everything happens inside that packaged environment you can rebuild anywhere.
3. Using existing devcontainers (example repos, team projects, etc.)
If you clone a repo that already has a .devcontainer/devcontainer.json, you don’t even have to create one yourself.
- Open the folder in VS Code.
- VS Code usually shows you a notification like: “This folder contains a Dev Container configuration. Reopen in Container?”
- Hit “Reopen in Container” and it repeats the build/connect process.
If you don’t see the notification, you can always go to the Command Palette and run Dev Containers: Reopen in Container manually.
It’s the easiest way to try it out: find an example repo like Microsoft’s vscode-remote-try-python, open it, and let it do its thing.
PyCharm and Rider: hopping into someone else’s lunchbox
JetBrains arrived later than the rest to the devcontainer world, but they’ve caught up: both PyCharm and Rider support connecting to devcontainers
defined by a devcontainer.json.
The philosophy here is different: JetBrains doesn’t generate the devcontainer for you (that’s better done with VS Code or by hand), but it does know how to:
- Read a
.devcontainer/devcontainer.json. - Use it to create the container via Docker.
- And connect to it as a runtime/indexing environment, etc.
1. Prerequisites
- Docker running on the host (again, see the Docker article for Windows/macOS [LINK A DOCKER]).
- A project with
.devcontainer/devcontainer.jsonalready in place. - A recent version of PyCharm / Rider that includes Dev Container support (PyCharm’s documentation marks this explicitly).
2. PyCharm: connecting to a devcontainer
Scenario: you have a Python project with a ready .devcontainer/ (maybe you generated it in VS Code, maybe by hand). You want to use PyCharm but run the code inside that container.
Simplified steps (per PyCharm’s documentation ):
- Open PyCharm. On the welcome screen you can:
- Open the local project that already has
.devcontainer, or - Use “Remote Development / Dev Container” options if you see them.
- Open the local project that already has
- Once the project is open, find and open
devcontainer.jsonin PyCharm’s editor. - In the left margin of the editor, PyCharm shows a small icon next to the file; clicking it should reveal an option like “Create Dev Container” or “Start Dev Container inside IDE.”
- Clicking it makes PyCharm use Docker to build and start the devcontainer following the
devcontainer.jsonrecipe. You’ll see progress in the Services window (the Docker/containers one). - When it’s done, you’ll have a Python interpreter based on that container. PyCharm will let you select it as the project’s interpreter (just like it does with virtual environments, Docker, etc.).
From there, your tests, your run config, your debugger… everything runs inside the container, but you’re still editing from your good old PyCharm.
3. Rider (Java, .NET): same concept, different menu
In Rider the drill is pretty much the same, just oriented toward Java/.NET projects.
Summary of how their documentation describes it:
- Open the project that already includes a
.devcontainer/devcontainer.json. - Open
devcontainer.jsonin the editor. - A small icon appears in the left margin; clicking it lets you select “Create Dev Container” (or a variant like “Create Dev Container and Clone Sources”).
- Fill in what it asks (repo, branch, etc., in case of remote cloning) and hit “Build Container and Continue.”
- Rider connects to the container, opens the project there, and lets you work as if it were just another remote Docker environment.
The key in both cases (PyCharm/Rider) is that they don’t create the devcontainer; they just use it. That’s why it makes a lot of sense to generate the configuration in VS Code (or by hand) and then reuse it across both worlds.
More things to tinker with in devcontainer.json
Without going full reference guide, when you start tinkering you’ll find fields that open up a lot of possibilities:
imageordockerFile: whether you want to start from a prebuilt image or your own Dockerfile.forwardPorts: ports that get automatically forwarded (great for webapps: 3000, 8000, etc.).mounts: extra volume mappings if you need to add host stuff beyond the code.postCreateCommand/postStartCommand: commands that run after creating/starting the container (e.g.,pip install -r requirements.txt).customizations.vscode.extensions: VS Code extensions you want auto-installed when someone opens the project in a devcontainer. This is one of the most useful features: it guarantees the whole team works with the same editor tools without anyone having to install anything manually. Some common examples:
"customizations": {
  "vscode": {
    "extensions": [
      "ms-python.python",               // Python support
      "ms-python.black-formatter",       // formatter
      "charliermarsh.ruff",              // fast linter
      "ms-azuretools.vscode-docker",     // Docker management
      "eamodio.gitlens",                 // advanced Git history
      "esbenp.prettier-vscode"           // formatter for JS/TS/HTML
    ]
  }
}
Note: this only works with VS Code (and derivatives like Cursor or VS Code forks). JetBrains IDEs (PyCharm, Rider, IntelliJ…) ignore the
customizations.vscodeblock; for them,devcontainer.jsondefines the image, ports, and commands, but IDE plugin configuration is managed from JetBrains itself, not from the file. Visual Studio (the “big” one, not VS Code) doesn’t support this block either.
In JetBrains, there’s also specific integration for adding IDE settings to the container from Rider/PyCharm itself (e.g., plugins), but that’s chapter two.
Epilogue: devcontainers and the dream of “works the same everywhere”
Devcontainers aren’t a silver bullet. You still need to understand Docker at least a little, configure resources with care (hello, WSL2 and vmmem), and accept that the first container build is going to take longer than opening the repo bare.
But in return, they give you something that, past a certain team size or project complexity, is worth its weight in gold:
- A clear way to say “this project needs this” and have the computer actually understand it.
- A decent barrier against the “works on my machine” excuse and twenty-page “installation steps” docs.
- And the freedom to switch laptops, operating systems, or IDEs without having to relearn how to tame the environment every time.
At the end of the day, a devcontainer is like a lunchbox: you put everything your app needs to live inside it — dependencies, tools, configuration, extensions — and seal it shut. It doesn’t matter where you open it — Windows, macOS, Linux, VS Code, JetBrains — it tastes exactly the same.
Which, in this industry, is practically science fiction.
Quick glossary
If any of these terms sound like the name of a progressive metal band, here’s the translation.
- devcontainer: a development environment packaged in a Docker container and defined by a
devcontainer.jsonfile. The IDE reads it, builds the container, and works inside it. - host: the physical machine (your laptop, your desktop) where Docker and the IDE run. Everything that isn’t “inside the container” is on the host.
- CI (Continuous Integration): a server or pipeline that automatically builds and tests code every time someone pushes changes to the repository.
- WSL2 (Windows Subsystem for Linux 2): a Windows compatibility layer that lets you run an actual Linux kernel inside Windows. Docker on Windows runs on top of it.
- volume (Docker): a mechanism for sharing folders between the host and the container (or for persisting container data). When you mount your code as a volume, changes are reflected on both sides.
- shim: a small intermediary executable that intercepts a call to a command (like
python) and redirects it to the correct binary based on the active configuration.
Sources and references
Everything you’ll need to win the “what if we use devcontainers” argument at the retro.
- Docker installation article - iamlino.net. Step-by-step guide for installing Docker without pain.
- Dev Containers - Visual Studio Code - Microsoft. Official Dev Containers extension documentation.
- Dev Containers Tutorial - Microsoft. Step-by-step tutorial for getting started with devcontainers in VS Code.
- The Ultimate Guide to Dev Containers - Daytona. Comprehensive guide on devcontainers and their ecosystem.
- Are Dev Containers Worth It? - Liske Blog. Analysis of devcontainer pros and cons.
- Introduction to Dev Containers - Backend Horizon. Introductory tutorial in Spanish.
- 6 Reasons to Consider Dev Containers - Cloud Native Now. Arguments for adopting devcontainers.
- Using Dev Containers in VS Code - Dev.to. Practical guide for using devcontainers in VS Code.
- Connect to a Dev Container - PyCharm - JetBrains. Official devcontainer documentation for PyCharm.
- Customizing devcontainer.json - Rider - JetBrains. Official devcontainer documentation for Rider.
- Start Dev Container Inside IDE - Rider - JetBrains. How to start a devcontainer from Rider.
- Dev Container Options - JetBrains (thread) - Reddit. Discussion about devcontainer options in JetBrains.
- 6 Reasons to Consider Dev Containers - Cloud Native Now. Supplementary article on devcontainer benefits.